All in One Solar Street Light Installation
Jul 24, 2025
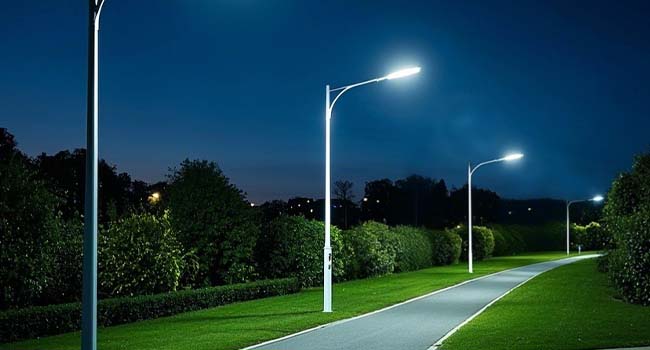
In an era where sustainability and energy efficiency are highly valued, all-in-one solar street lights have revolutionized outdoor lighting. These innovative fixtures require no complex wiring and are not dependent on the power grid, providing a cost-effective and environmentally friendly alternative to traditional streetlights. Whether you're a municipal planner, a property manager, or a homeowner looking to enhance your outdoor safety, mastering the installation of these types of streetlights is key to realizing their full potential. This guide will take you through every step of the process, from choosing the right model to maintaining optimal performance, so you can enjoy consistent solar lighting for the long term.
Understanding All-in-One Solar Street Lights
All-in-one solar street lights integrate all core components into a single compact unit, including solar panels, LED lights, batteries, controllers, and often motion sensors. This design simplifies installation by eliminating the need for separate wiring for each component and reduces maintenance requirements compared to split solar street lights.
Key Benefits of Integrated Solar Street Lights for Projects
Integrated solar street lights can run entirely on solar energy, reducing grid power costs and achieving self-sufficiency. At the same time, it is environmentally friendly as it uses renewable energy, which reduces the carbon footprint. Moreover, it is easily scalable as there is no need to upgrade the electrical infrastructure when installing additional street lights. Plus, with the right choices, it can withstand inclement weather and has a high degree of durability.
Choosing the Right All-in-One Solar Street Light
Quality and Durability
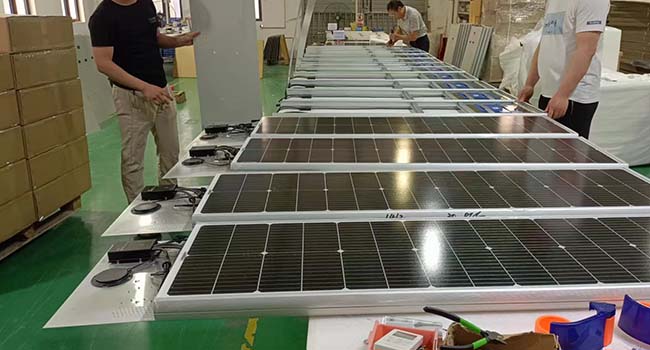
When choosing an all-in-one solar street light, prioritize products made from corrosion-resistant materials, such as aluminum alloys, to withstand rain, snow and extreme temperatures. Also, choose a street light with an IP65 rating or higher, which ensures good protection against dust and low-pressure water jets, which are critical for outdoor use. Also, look for certifications such as CE to help verify the manufacturing standards of the product.
Solar Panel Efficiency
Monocrystalline panels are ideal, with photovoltaic conversion efficiencies of 18%-22%, higher than the 15%-17% of polycrystalline panels, making them ideal for areas with limited light. Additionally, it is important to choose the right size panel for your needs. Larger panels (e.g. 100W and above) are better suited for high-traffic areas that require prolonged illumination.
Battery Capacity
|
Battery Type |
Advantages |
Suitable Scenarios |
|
Lithium-ion Battery |
High energy density, long lifespan (5–7 years), better performance in cold weather |
Outdoor applications requiring long-term and stable power supply |
|
Lead-acid Battery |
Lower cost |
Budget-sensitive, short-term use cases with low performance requirements |
When selecting a battery, capacity should be calculated based on usage. In general, a 10,000mAh battery will typically power a 30W LED light for 8-10 hours. For areas with long nights or cloudy weather, a higher capacity battery should be selected.
LED Light Efficiency
Choose an LED light with 100 lumens per watt or more, which produces more light with less power. For example, 30W produces 3000 lumens, which extends battery life. Also consider the color temperature. 5000K-6500K (cool white) is good for streets, parking lots, and other areas that need bright, clear lighting; 3000K-4000K (warm white) is better for residential areas.
Intelligent Control
Solar street lights with motion sensors can automatically dim when pedestrians or vehicles are detected, and dim to 30% brightness when no one is around, reducing energy consumption by more than 50%. Streetlights with programmable timers can be set to run from 7pm - 6am to avoid unnecessary power consumption. And light sensors ensure that the streetlights automatically turn on at dusk and off at dawn, eliminating the need for manual adjustments.
All in One Solar Street Light Installation Process
Choose the Installation Location
Solar panels need 6-8 hours of direct sunlight per day, so avoid areas shaded by trees, buildings, etc. Even partial shade can reduce charging by more than 30%. Even partial shading may reduce charging by more than 30%. In the northern hemisphere, the panels should face south; in the southern hemisphere, they should face north, so as to obtain the maximum amount of sunlight. For street lighting, a mounting height of 5-8 meters is sufficient to cover a wider area; for sidewalk lighting, a height of 3-5 meters is sufficient.
Prepare the Mounting Pole or Bracket
For pole-mounted installations, use galvanized steel poles (at least 4 inches in diameter), which resist rust and corrosion for longer life. For pole-mounted installations, use a galvanized steel pole (at least 4 inches in diameter), which is resistant to corrosion and prolongs service life. When installing the pole, it should be fastened vertically into a concrete base, the depth of which should be adjusted according to the local geological conditions.
In case of wall-mounted type, the bracket needs to be fixed on a solid surface with expansion bolts. The length of the expansion bolts should be selected according to the thickness of the wall to ensure that the depth of embedding into the wall is not less than 5 cm. Be careful to avoid fixing on wooden wall, the wood is easy to deform under long-term stress, which may cause the street light to sag or even fall off.
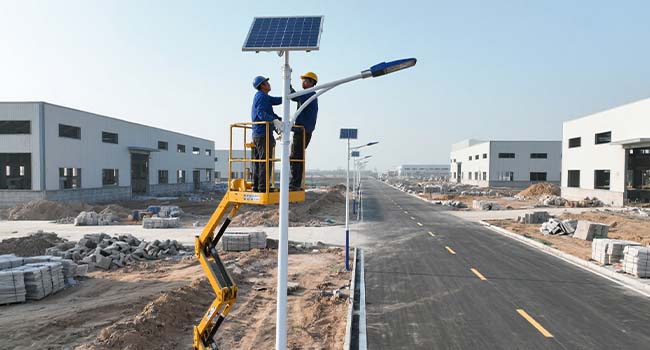
Installing the Street Light
When installing the street light, lift the street light carefully to avoid collision damage to the street light housing due to uneven force with one hand. When aligning the mounting holes, you can first gently screw in one bolt to locate it, and then install the other bolts in turn to ensure that the street light fits tightly with the mounting surface. Then use a wrench to tighten the bolts, but be careful, over-tightening may damage the shell, until the bolt can not be turned by hand.
After the installation is completed, gently push the street light from different directions to observe whether there is any shaking, if there is a slight shaking, you can gradually fine-tune the tightness of the bolts until the street light is completely stable, to avoid the loosening of parts due to long-term vibration.
Adjust the Angle of the Solar Panel
Adjust the angle of the panel according to the latitude, the higher the latitude, the angle should be increased appropriately, for example, temperate regions adjusted to 30-40 °, you can use the angle ruler close to the surface of the panel to make precise adjustments, the error is recommended to be controlled within ±2 °. After adjustment, use a wrench to slowly tighten the angle locking bolts to ensure that the bolts and the bracket bite tightly to prevent the battery plate from shifting in strong winds. Another useful tip is to clean the surface of the panels with a soft, slightly damp cloth before final adjustment. Even a thin layer of dust can reduce the efficiency of power generation by about 5%, and dust-free glass allows sunlight to be absorbed more fully.
Check the Light's Operation
To test, cover the solar panel with a dark colored cloth to simulate night and the LED should light up within 10 seconds. If the light is equipped with a motion sensor, walk up to the light and see if it changes from low to high brightness mode. If the streetlight does not work properly, check for loose wires in the housing or disconnected connection tabs on the battery (some models are shipped with protective tabs).
Final Inspection
For the final inspection, make sure that all bolts are tightened, and retighten any bolts that have loosened during the test. Also, make sure that the panels are still at the correct angle and have not been accidentally shifted during installation. Additionally, clear debris from the bottom of the pole and prevent water from accumulating if there is associated wiring.
Maintenance and Troubleshooting
Cleaning
To clean your solar panels regularly, wipe them with a damp microfiber cloth to remove dust, bird droppings, or pollen, which can block sunlight. In dusty areas (such as construction sites), clean every two weeks. Be careful to avoid using abrasive cleaners, which can scratch the glass and reduce panel efficiency.
Battery Maintenance
Quarterly in the afternoon on a sunny day, use a multi meter to check the battery voltage by touching the positive and negative terminals of the battery with the meter pens respectively. The voltage of a healthy lithium-ion battery should be stabilized at 3.2-3.6V when it is fully charged. If the voltage is lower than 2.8V for two consecutive times, and there is no obvious recovery after charging, it means that the battery performance has been seriously degraded, and it is necessary to contact the manufacturer to get a compatible battery of the same type for replacement (non-original batteries may lead to controller failure).
Meanwhile, wipe the battery electrodes with a dry cloth every month. If white or green corrosion is found, dip it in a small amount of alcohol and gently wipe it off, then apply a thin layer of petroleum jelly to prevent the electrodes from oxidizing.
Seasonal Inspection: Adapting to Weather Changes
Different seasons have different inspection priorities. After snowfall in winter, the snow on the battery board should be removed within 24 hours, and a soft-bristle brush can be used to sweep gently. When the thickness of snow exceeds 5 centimeters, it may crack the battery board due to its excessive weight, and the water stains after snow melting should be wiped dry in time to prevent the frame from being damaged by low-temperature icing.
When the temperature is high in summer, check whether the ventilation holes on the top and sides of the street light are blocked by leaves and cobwebs, as poor ventilation will lead to an internal temperature of more than 60℃, which will accelerate the aging of the battery and electronic components. Before the rainy season, carefully check the sealing tape at the joints of the shell, if there is any loosening or cracking, use special sealant to repair it in time, check whether there is water seepage inside after a rainstorm, and make sure that the controller and battery are in a dry environment.
Installation of integrated solar street lights is a wise investment, but the premise is properly installed. By choosing a quality model, installing it in a well-lit location, and performing basic maintenance, you'll be able to enjoy bright, eco-friendly lighting for a long time. Remember, successful installation is not only about following the steps, but also about choosing the right tools for your environment. With this guide, you're ready to light any outdoor space with solar power.
related
-
 Off-Grid Road Safety: The Cost-Benefit Analysis of Solar Road Studs in Provincial ProjectsJun. 24, 2026
 -
 The Ultimate Checklist for Inspecting Road Studs Before Installation in Infrastructure ProjectsJun. 04, 2026
 -
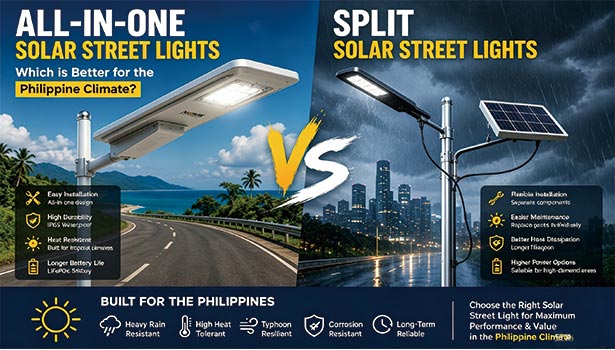 All-in-One vs. Split Solar Street Lights: Which is Better for the Philippine Climate?May. 26, 2026