How to Select the Best Site and Properly Install Solar street lights?
Sep 08, 2025
Solar street lights have become an ideal choice for modern road, community, and public space lighting due to their eco-friendly, energy-efficient nature and independence from the grid. However, their performance largely depends on the selection of installation locations and adherence to proper installation procedures.This article will detail key site selection considerations, step-by-step installation processes, common issues and solutions, as well as scientific maintenance techniques to help you maximize the efficiency of solar street lights.
How to Choose the Right Location for Solar Street Lights?
Road and Traffic Considerations
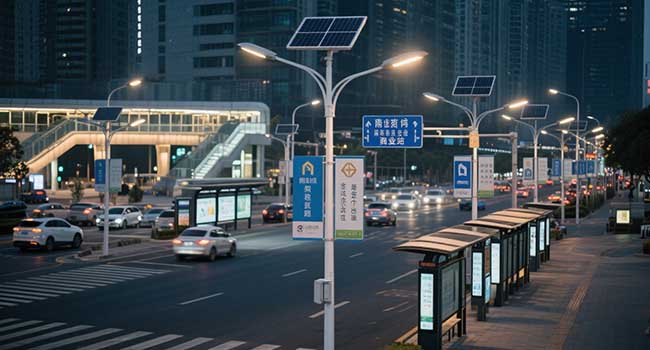
The installation location and spacing of solar street lights must strictly match the actual road conditions. For wider roads (such as four-lane or wider roads), reduce the spacing to 6-8 meters to avoid lighting blind spots. For rural roads, a spacing of 10-12 meters is sufficient. Prioritize coverage at intersections, sidewalks, and other high-traffic pedestrian areas to ensure nighttime safety and prevent accidents caused by inadequate lighting.
Clearance from Other Structures
Thoroughly inspect both “overhead” and “underground” hazards around installation points. Above ground, installation is strictly prohibited within 10 meters of high-voltage power lines to prevent electrocution or electromagnetic interference. For underground structures, coordinate with municipal authorities to obtain utility maps and avoid gas pipelines, communication cables, etc. If installation within utility zones is unavoidable, execute safety agreements and employ trench less techniques to prevent infrastructure damage.
Environmental Considerations
Avoid flood-prone areas, particularly low-lying zones where water levels may exceed 30 cm during rainy seasons, to prevent battery box water ingress and short circuits. Soil bearing capacity is equally critical: Firm soils like clay may use standard 30 cm deep foundations; loose soils such as sandy or soft soils require foundations deepened to 50-80 cm with reinforced concrete to prevent lamp post tilting or collapse due to foundation settlement.
Sunlight Assessment
The installation site must ensure at least 6 hours of unobstructed direct sunlight daily between 9:00 AM and 3:00 PM. Pre-measure the height and distance of surrounding trees and structures from the installation point. For example: If a 5-meter-tall building is 10 meters away, ensure the horizontal distance between the installation point and the building is no less than 10 meters (i.e., obstacle height : horizontal distance ≤ 1:2) to prevent shadowing. Simultaneously record solar street light illumination data to inform battery capacity and panel power selection.
Latitude and Orientation
Panel tilt must be precisely adjusted by latitude: Regions between 30°N and 40°N latitude: Recommended tilt angle is local latitude + 5° (winter) or -5° (summer).Regions below 20°N latitude: Maintain a tilt angle of 15°-20°. For orientation, the northern hemisphere requires strict south-facing alignment (with no deviation exceeding 5°), while the southern hemisphere requires north-facing alignment. Use a compass for calibration to ensure midday sunlight strikes the panel vertically, maximizing power generation.
How to Install Solar Street Lights?
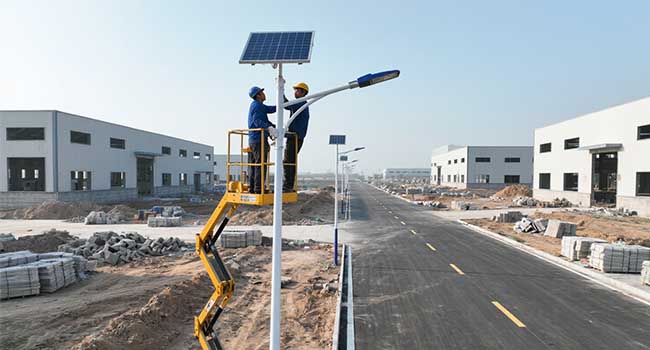
Install the Bracket
The first step in installing solar street lights is securing the bracket, the critical component supporting the solar panel and luminaire. First, select a stable, unobstructed location for the bracket, ensuring it can be mounted vertically and that the solar panel receives maximum sunlight at this position. Once the location is determined, securely fasten the bracket to the light pole or mounting surface with screws. Ensure the bracket does not wobble, as the stability of the entire system relies on it.
Install the Solar Panel
After securing the bracket, the next step is to install the solar panel. Adjust the panel's tilt angle according to local latitude and seasonal variations to optimize sunlight capture. In the Northern Hemisphere, panels should face south; in the Southern Hemisphere, they should face north. Position the panel correctly on the bracket and secure it firmly to prevent movement or falling. After installation, connect the panel to the controller using proper wiring and ensure all connections are waterproof.
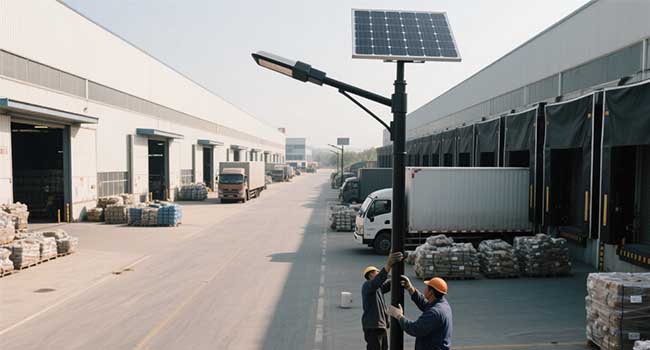
Install the Light Fixture (LED Light)
Next, install the LED light fixture. Mount the fixture on the bracket for optimal illumination, positioning it opposite the solar panel to maximize nighttime brightness. Adjust the fixture angle to direct light toward the target area. Once positioned, connect the fixture to the solar panel using cables. Ensure wires are insulated and waterproofed to withstand environmental impacts.
Install the Controller and Sensor
The controller is the core component managing the solar street light's operation, enabling automatic activation at dusk and deactivation at dawn. Mount the controller near the solar panel to ensure efficient signal transmission. Connect a light sensor capable of monitoring ambient light conditions to automatically regulate light intensity. Configure the controller correctly to automatically control illumination levels and operating schedules.
Testing and Debugging
After all components are installed, test the system. First, verify that the battery charges fully under sunlight. To test the light function, block the solar panel to simulate nighttime conditions. The system should automatically illuminate the light, and observe its brightness. If the light does not turn on, check the wiring connections and confirm the battery is fully charged. If necessary, inspect and adjust system settings to ensure proper operation.
Common Installation Issues and Solutions
|
Common Issue |
Possible Cause |
Solution |
|
Solar panel receives insufficient sunlight |
Installation blocked or panel facing the wrong direction |
Adjust panel orientation or move to an unobstructed location |
|
Light not turning on |
Battery failure or poor wiring connection |
Check battery and wiring, ensure all connections are secure and waterproof |
|
Controller cannot switch lights on/off |
Light sensor failure or connection problem |
Inspect light sensor and controller connections to ensure proper operation |
|
Battery cannot be fully charged |
Solar panel receives insufficient sunlight |
Keep panel clean and ensure it is positioned to maximize sunlight exposure |
How to Maintain Solar Street Lights Scientifically and Effectively?
Check Wiring Connections
Monthly inspections are required for the terminals of controllers, batteries, and panels to check for oxidation, loose connections, or cable aging. In rainy regions, replace waterproof seals quarterly and wrap joints with insulating tape to prevent water ingress causing short circuits. If the outer sheath of solar street light cables is damaged, immediately replace it with flame-retardant cables of the same specification to prevent leakage or signal interruption.
Check the Battery and Control System
Use a multi meter to test battery voltage every 3 months: fully charged voltage should be 13.5-14.5V (for 12V systems), and post-discharge voltage should not fall below 10.5V. Replace batteries promptly if either threshold is exceeded. Test the controller's light sensor sensitivity monthly by blocking the sensor with an opaque object. Observe if the fixture illuminates within 3 seconds. If the delay exceeds 10 seconds, recalibrate or replace the sensor to ensure proper automatic on/off functionality at dusk/dawn.
Inspect the Light Fixtures and Lighting Effect
Clean dust and insect remains from the fixture surface every 2 months to prevent reduced light transmission. If three or more LED bulbs fail to illuminate, replace the entire light board to prevent circuit burnout from localized overload. Simultaneously measure road surface brightness with a lux meter: main roads must maintain 20-30 lux, while side roads require no less than 10 lux. Inspect light source power or adjust installation angle when brightness drops over 30%.
Regular Cleaning of Solar Panels
Clean solar panels every 2 months during spring and summer, every 3 months during fall and winter, and monthly in dusty or foggy regions. Use clean water and a soft-bristle brush for gentle wiping. For stubborn stains, apply a small amount of neutral detergent (e.g., dish soap). Avoid steel wool or strong acidic solutions to prevent scratching the panel coating. After cleaning, inspect panels for cracks. Replace damaged panels promptly to prevent water ingress and internal circuit damage.
The efficient operation of solar street lights relies on proper site selection, standardized installation, and regular maintenance. By following the key points outlined in this article, you can ensure your solar street lights deliver stable, long-lasting illumination, providing eco-friendly and reliable lighting for roads and public spaces.
related
-
 Off-Grid Road Safety: The Cost-Benefit Analysis of Solar Road Studs in Provincial ProjectsJun. 24, 2026
 -
 The Ultimate Checklist for Inspecting Road Studs Before Installation in Infrastructure ProjectsJun. 04, 2026
 -
 All-in-One vs. Split Solar Street Lights: Which is Better for the Philippine Climate?May. 26, 2026