Avoid These 7 Mistakes in Solar Street Light Installation
Sep 30, 2025
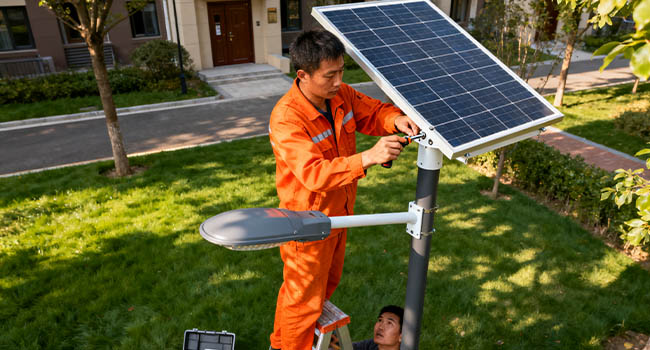
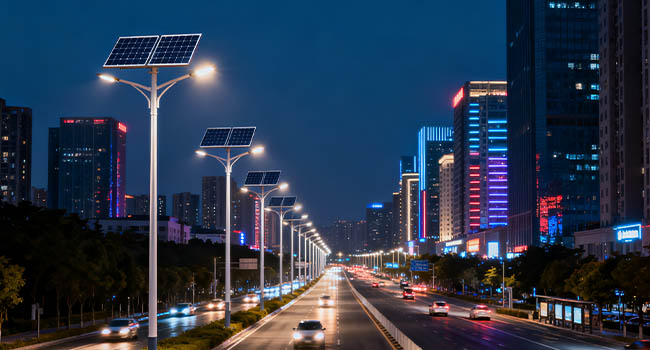
In urban and rural lighting projects, solar street lights are widely adopted for roads and communities due to their energy-saving, eco-friendly nature and independence from external power grids. High-quality products reduce energy consumption and maintenance costs, but installation quality directly determines their lifespan and operational effectiveness. Negligent installation can lead to reduced charging efficiency and shorter illumination times at best, or equipment failure and complete in operability at worst. This article dissects 7 common errors, detailing their manifestations, consequences, and corrective measures to help mitigate risks and maximize energy-saving benefits.
Excessive Shading in Installation Areas
Common Mistake
Some solar street lights are installed under protective canopies or beneath wires, branches, or other light poles for “protection” or aesthetic reasons. This causes large areas of the solar panels to be shaded during daylight hours, preventing adequate sunlight exposure.
Directly Cutting Off the Energy Source
Solar panels are the core power-generating components. When shaded, their light absorption plummets, drastically reducing charging efficiency. Most panels consist of multiple series-connected cell strings. If one string is deeply shaded, it may create an “open circuit.” In parallel configurations, shaded panels may even cease generating power entirely, directly impacting overall power supply and resulting in insufficient illumination.
Pre-site Survey for Unobstructed Areas
Conduct on-site inspections before installing solar street lights, prioritizing open areas free from long-term obstructions. Avoid dense forests, north sides of tall buildings, and locations beneath high-voltage power lines. If temporary obstructions exist, plan solar panel height or positioning to ensure at least 6-8 hours of effective sunlight daily, meeting basic charging requirements.
Reference Light Sources Near Solar Panels
Common Mistake
Installing solar Street lights near traditional grid-connected Street lights, garden lights, or billboard lights subjects solar panels to persistent “stray light interference.” This prevents accurate detection of natural light changes, overlooking the impact of stray light on equipment performance.
Street Lights Fail to Illuminate When Needed
Controllers determine day/night cycles by detecting light intensity via solar panels, activating Street lights only when illumination falls below the “light-control voltage threshold.” When adjacent light sources activate at night, solar panels misinterpret this as “daytime,” causing charging voltage to exceed the threshold. This prevents Street lights from illuminating normally, rendering them ineffective for nighttime illumination.
Avoid Stray Light or Use Anti-Interference Controllers
When installing solar Street lights, maintain distance from other light sources: keep at least 5-10 meters from standard grid-connected Street lights and 10-15 meters from high-brightness advertising signs. If stray light cannot be avoided, select controllers with “anti-interference functionality” to filter stray light signals and ensure accurate day/night detection.
Solar Panels Installed Indoors
Common Mistake
In scenarios like underground parking entrances or residential bike sheds, installers may mount both lights and solar panels indoors for convenience, mistakenly assuming “any light will charge” while ignoring the significant difference in light intensity between indoor and outdoor environments.
Charging Efficiency Plummets, Insufficient Power
Indoor or sheltered light intensity is significantly lower than outdoors. Transparent roofs also filter out 30%-50% of effective sunlight, while daylight hours are drastically reduced. Solar panels cannot generate enough charge to meet nighttime power demands, causing Street lights to dim after 1-2 hours of operation or fail to illuminate entirely.
Separate Outdoor Charging and Indoor Discharging Installation
Adopt a “separate solar panels and lighting fixtures” approach: install solar panels outdoors in open areas to ensure ample sunlight for charging; mount lighting fixtures indoors or under sheds where illumination is needed, connecting them via wiring (refer to Error 6 for wiring specifications). This achieves “outdoor charging and indoor electricity usage.”
Incorrect Solar Panel Angle Adjustment
Common Mistake
During Street light installation, solar panel tilt angles are randomly adjusted without considering critical factors like local latitude and road orientation. This prevents panels from facing sunlight directly, hindering maximum light absorption.
Poor Charging Efficiency, Worse in Winter
Solar panels absorb light most efficiently when sunlight strikes perpendicularly. Greater angle deviation reduces efficiency; deviations exceeding 30° cause over 50% efficiency loss. During winter, the low solar zenith angle means improper tilt can result in no effective sunlight exposure throughout the day, causing battery depletion and poorer equipment performance.
Adjust Based on Latitude and Road Orientation
Set the base tilt angle approximately equal to the local latitude (Northern Hemisphere). For example, Beijing's latitude is 39°, so set the base angle to 39°. Increase by 5°-10° in winter and decrease by 5°-10° in summer. For north-south roads, panels face true south. For east-west roads, prioritize true south orientation. If the west side is unobstructed, southwest orientation is acceptable. Increase the tilt angle appropriately if terrain obstructions are present.
Opposite-Facing Tilt of Street lights on both Sides
Common Mistake
Pursuing “symmetrical aesthetics” by tilting solar panels on opposite sides of the road “facing each other” (e.g., left side tilted right, right side tilted left) prioritizes visual appeal over actual functional requirements.
Insufficient Charging on One Side Leads to Uneven Illumination
In the Northern Hemisphere, the sun's path primarily follows a near-south trajectory. When panels are tilted “facing each other,” only one side effectively captures sunlight from the south, while the other faces north or deviates significantly, resulting in extremely low charging efficiency. This ultimately causes “one side bright, one side dim” on opposite sides of the road, creating uneven lighting.
Functionality First: Unified Orientation
Abandon flawed symmetry during installation. Align both solar panels uniformly toward true south (in the Northern Hemisphere) to ensure adequate sunlight and optimal charging efficiency. For aesthetic considerations, adjust the lamp post design or solar panel bracket angles to balance visual appeal with functionality.
Arbitrary Extension of Solar Panel Wires
Common Mistake
When solar panels and luminaires are installed separately over 10 meters apart, installers often use standard electrical wires without considering critical parameters like material or gauge, assuming “any connection will do.”
Significant Wire Loss Reduces Charging Capacity
Solar panels produce low output currents. Standard wires, typically aluminum or low-grade copper, have poor conductivity and high resistance. Longer distances and thinner gauges cause severe wire loss. Using 1.0mm² aluminum wire over 10 meters incurs 20%-30% loss, leading to long-term battery depletion and reduced Street light illumination duration.
Selecting Wire by Distance
Distance ≤5 meters: Use ≥1.0mm² copper wire (loss ≤5%).5-15 meters: Use ≥1.5mm² copper wire (loss ≤8%) For 15-30 meters, use ≥2.5mm² copper core wire with ≤12% loss; For distances over 30 meters, use ≥4.0mm² copper core wire or install a voltage regulator with ≤15% loss. Use dedicated terminals for connections and ensure waterproof insulation.
Incorrect Use of Remote Controller
Common Mistake
Field installers unfamiliar with solar street light remote functions press buttons arbitrarily without reading manuals or training, causing controller parameter errors—e.g., setting “Light Control Mode” to “Time Control Mode” or configuring illumination time to 0 hours.
Controller Malfunction Causing Equipment Failure
The controller serves as the “brain” of the Street light. Incorrect parameters cause it to “malfunction,” resulting in issues like “illuminating during daytime but failing at night” or “turning off after 10 minutes.” Severe cases may lead to battery overcharging/overdischarging, shortening battery life or damaging the controller. 30% of “non-illumination failures” originate from this.
Train Staff Before Selecting Smart Controllers
Before installation, train personnel to master remote control functions and configure parameters step-by-step according to manuals. Prioritize smart-controlled Street lights, such as products equipped with fully intelligent controllers and mobile apps supporting “one-touch mode switching.” After setup, conduct simulated testing with light-blocking cloth to ensure proper operation.
Solar Street light installation details significantly impact performance. From avoiding obstructions to selecting wiring, adjusting angles to using remote controls, each step requires meticulous attention. Installers must conduct advance site surveys, familiarize themselves with equipment, and follow standard procedures. Project owners can reduce complexity and fault risks by selecting smart control products. Only through proper installation and maintenance can Street lights maximize their advantages and contribute effectively to lighting infrastructure.
related
-
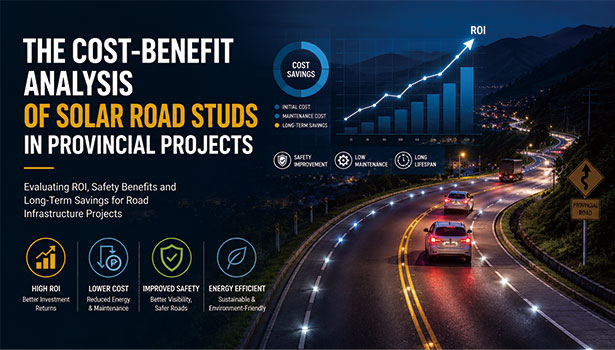 Off-Grid Road Safety: The Cost-Benefit Analysis of Solar Road Studs in Provincial ProjectsJun. 24, 2026
 -
 The Ultimate Checklist for Inspecting Road Studs Before Installation in Infrastructure ProjectsJun. 04, 2026
 -
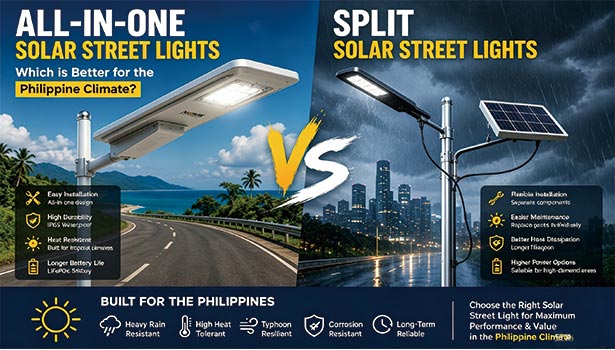 All-in-One vs. Split Solar Street Lights: Which is Better for the Philippine Climate?May. 26, 2026