How to Fix a PIR Sensor Solar Light: An Ultimate Repair Guide
Dec 16, 2025
Outdoor PIR sensor solar lights have become popular lighting solutions for gardens, stairwells, and parking lots due to their energy efficiency and wireless installation. Among these, outdoor solar motion lights and garden solar street lights are especially favored for both residential and commercial settings. However, issues like failure to illuminate at night, malfunctioning motion detection, or daytime false triggers can occur during use. These problems not only affect user experience but may also pose safety risks. Next, we'll guide you through mastering PIR sensor solar light repair techniques from four core perspectives: working principles, common faults, step-by-step fixes, and daily maintenance.
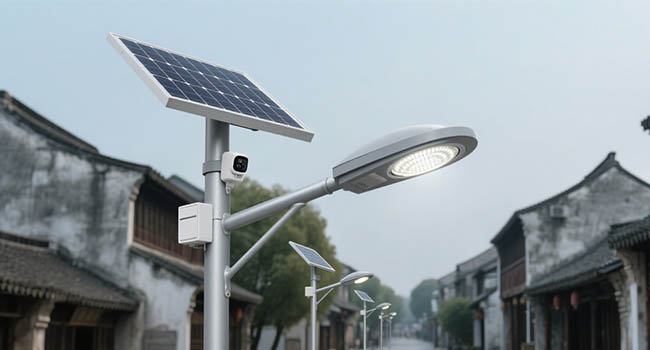
Understanding How PIR Sensor Solar Lights Work
To accurately diagnose and repair PIR sensor solar lights, grasping their operational logic is essential. Solar panels capture sunlight and convert it into electricity, charging the battery. The battery stores energy during daylight hours and powers low-power, long-life LED bulbs at night. The PIR sensor employs passive infrared detection technology, which does not actively emit energy. Instead, it detects temperature changes from moving heat sources like humans or animals, triggering the light switch. The light sensor identifies daytime and nighttime conditions, ensuring the light activates only in low-light environments and avoids false daytime triggers.
The operational flow of PIR sensor solar lights is straightforward: sunlight powers the solar panel to generate electricity, which is stored in the battery. At night, the light sensor first triggers standby mode. When the PIR sensor detects motion, the LED lights illuminate immediately. Without motion, the lights turn off after a delay. Understanding this logic enables quick troubleshooting of core issues like sensor malfunctions.
Common Issues with PIR Sensor Solar Lights
Failure to illuminate at night
This is the most frequent malfunction, characterized by lights remaining off after dark regardless of motion detection. Key causes include: depleted or degraded batteries; solar panels obstructed or soiled, reducing charging efficiency; malfunctioning or improperly triggered PIR sensors; loose internal wiring or poor connections.
Quick Troubleshooting: During daytime, cover the solar panel with a black cloth or cardboard box to simulate night conditions. Observe if the light activates. If it remains off, prioritize checking the battery and solar panel—a common troubleshooting approach for solar lights that fail to charge.
No Response to Motion Detection
Manifested when humans or animals move in front of the light at night, yet the light fails to illuminate. This is a classic issue of motion detection failure in solar lights. Possible causes include: dust, spider webs, or rain stains obstructing the PIR sensor lens; improper sensor angle failing to cover the target area; sensitivity set too low (adjustable on some models); or sensor range limitations (typically 5-10 meters effective distance beyond which it cannot trigger).
Daytime False Triggering
Manifested as frequent automatic lighting activation during daylight hours when ample light is present, resulting in wasted energy. Potential causes include: the light sensor being obscured by leaves or dust, preventing accurate daytime environment recognition; the solar panel receiving unstable power due to partial shading from trees or buildings; and the PIR sensor's excessive sensitivity mistaking wind-blown movement or temperature fluctuations for motion signals.
Light Flickering / Intermittent On/Off
This manifests as frequent flickering after the light turns on at night, or the light immediately turning back on after turning off. This is a common issue with solar lights. Possible causes include poor battery contact causing intermittent power supply, loose or aged internal wiring leading to unstable current flow, extreme temperatures exceeding 45°C or falling below -10°C affecting component performance, and PIR sensor malfunction triggering frequent false activations.
Step-by-Step Guide to Fixing a PIR Sensor Solar Light
Preparation
Tools required: a soft cloth to avoid scratching components, Phillips/flathead screwdrivers for disassembling the housing, a multimeter (optional for testing battery voltage), and a compatible replacement battery (e.g., dedicated lithium battery matching voltage and capacity). Such batteries are common repair parts for these solar lights.
Always remove the battery before starting to prevent short circuits. Handle the housing with care during disassembly to avoid damaging internal wiring. When cleaning the solar panel, avoid corrosive cleaners like alcohol or disinfectants to preserve its functionality after cleaning.
Inspect the Battery and Charging System
The battery serves as the “energy core” of solar lights, with 80% of non-illumination issues stemming from battery or charging problems. Replacing solar light batteries is also the most common repair operation. First, check the solar panel's installation location to ensure it is unobstructed. Next, clean the solar panel by gently wiping its surface with a damp soft cloth to remove dust, leaves, bird droppings, and other debris, preventing dust from blocking and affecting charging efficiency.
Then test the battery condition. Remove the battery and use a multimeter to check the voltage. A normal lithium battery voltage ranges from approximately 3.7V to 7.4V. If the voltage is significantly below the standard value, or if the light restores after replacing with a new compatible battery, it indicates the original battery has aged and needs replacement. Select compatible solar light battery maintenance accessories. Finally, inspect the battery installation to ensure the positive and negative terminals make firm contact with the connectors, with no looseness or oxidation. If rust is present on the connectors, wipe them clean with a dry cloth.
Troubleshoot the PIR Sensor
If the battery and charging function normally but motion detection fails to respond, focus on inspecting the PIR sensor—this is a critical calibration step. First, locate the sensor position. The PIR sensor is typically near the LED light, appearing as a small black or transparent circular window. Next, gently wipe the lens surface with a soft cloth to remove dust, cobwebs, and rain residue. Contamination blocks infrared signals and causes detection failure. Then adjust the angle and sensitivity. Recommended installation height is 2-3 meters. Aim the sensor toward target areas like doorways or pathways, tilting downward at 15-30°. Turn clockwise to increase sensitivity and counterclockwise to decrease. Reduce sensitivity slightly if daytime false triggers occur.
Finally, simulate nighttime conditions by covering the solar panel or moving slowly within 5-10 meters at night. Observe if the light activates promptly. If it only works at close range, readjust the angle or sensitivity.
Repair the Light Sensor
The light sensor distinguishes between day and night. Malfunctions can cause lights to turn on during daylight or remain off at night. Repairing the light sensor is key to resolving these issues. First, clean the light sensor. Typically located adjacent to the PIR sensor, wipe its surface with a soft cloth to ensure no obstructions.
Then perform a simulated night test: During daytime, cover the solar panel and light sensor with a black cloth. Wait 30 seconds to 1 minute. If the light activates, the sensor functions normally. If it remains off, the light sensor may be damaged and requires replacement. Some models feature a reset button. Refer to the product manual and press and hold for 3-5 seconds to restore factory settings. This common reset procedure for solar lights resolves false triggers caused by misconfiguration.
Replace Faulty Components
If the light still malfunctions after troubleshooting, a component is likely irreparably damaged and requires replacement. Component replacement is the final repair option. When replacing the battery, select a storage battery compatible with the original device to prevent damage from voltage or capacity mismatches. For sensor replacement, purchase an identical PIR sensor or light sensor model. Search by device model on e-commerce platforms, disassemble the old sensor following the product manual, and install the new sensor. Ensure wiring connections match and are not reversed.
Replace the solar panel if it is cracked, aged (e.g., yellowed surface), or shows no charging response. Use a solar panel of the same specifications, ensuring the connector type matches. After installation, verify the correct angle and ensure no obstructions. If the LED bulb is damaged, replace the solar light's LED bulb as well.
PIR Sensor Solar Light Routine Maintenance
Regular Cleaning and Inspection
Clean the solar panel 1-2 times monthly. Wipe it promptly after rainy seasons or windy/dusty days to prevent prolonged dust or leaf buildup. Regular cleaning ensures optimal charging efficiency. When cleaning the solar panel, also wipe the sensor lens to keep surfaces clear. Inspect the battery every 6-12 months. If you notice significantly reduced runtime after charging, replace it promptly to maintain the solar light's battery health.
Optimal Installation Location and Angle
Install solar panels in unobstructed, direct sunlight locations, avoiding shade from trees or buildings. Ensure 6-8 hours of daily sunlight exposure—this is the core principle of solar light installation. Mount PIR sensors at a height of 2-3 meters with a downward angle of 15-30°, avoiding alignment with heat sources like air conditioner units or streetlights to prevent false triggers. Avoid installing the light body near drainage areas or other water-prone zones to prevent rainwater ingress causing short circuits. Plan the optimal installation location for solar lights carefully.
Environmental Protection (Extreme Weather Preparedness)
Before severe weather events like heavy rain or snowstorms, protect solar lights by installing transparent plastic covers or temporarily removing and storing them to prevent water ingress and snow damage. Avoid installing lights on west-facing walls or other areas exposed to prolonged sunlight, as high temperatures accelerate component aging. In cold winter regions, choose solar lights with low-temperature batteries capable of normal operation down to -20°C. Ensure lamps are securely fastened during installation to prevent damage from being blown over during typhoons or strong winds, enhancing environmental protection.
Regular Function Testing
For lighting functionality, cover the solar panel during daylight hours and observe whether the light turns on and off normally. Motion detection testing requires moving at night from varying distances and angles to verify sensor sensitivity and range. Charge testing can be performed after consecutive sunny days by observing the nighttime illumination duration. Typically, a fully charged unit should illuminate continuously for dozens of cycles. Regular testing helps extend the solar light's lifespan.
When to seek professional assistance or replace equipment?
Not all malfunctions can be resolved independently. Contact a professional repair technician or replace the light entirely if any of the following occur:
Extensive internal wiring burnout or short circuits, such as detecting a burning smell or observing blackened wires.
Severe solar panel cracking or complete LED module failure, where the light remains off even after battery replacement.
Unavailability of matching replacement parts for the PIR sensor or light sensor, resulting in prohibitively high repair costs—e.g., replacing multiple core components exceeding 50% of the new lamp's price.
Replacement Recommendations: Standard PIR sensor solar lights typically last 3-5 years. If your unit exceeds 5 years of use and experiences frequent malfunctions, consider upgrading to a cost-effective solar light with enhanced durability for extended outdoor operation. These wireless solar lights and energy-efficient solar street lights represent mainstream alternatives.
Mastering these repair and maintenance techniques allows you to easily resolve most common issues with PIR sensor solar lights, ensuring they continue providing stable illumination for courtyards, stairwells, and similar settings. Regular cleaning, installation calibration, and periodic inspections not only extend the device's lifespan but also maximize its energy-saving and convenient advantages. If encountering complex malfunctions or severe device aging, promptly replacing compatible components or the entire light ensures you can continue enjoying the safety and convenience of outdoor sensor lighting.
related
-
 Off-Grid Road Safety: The Cost-Benefit Analysis of Solar Road Studs in Provincial ProjectsJun. 24, 2026
 -
 The Ultimate Checklist for Inspecting Road Studs Before Installation in Infrastructure ProjectsJun. 04, 2026
 -
 All-in-One vs. Split Solar Street Lights: Which is Better for the Philippine Climate?May. 26, 2026