Solar Road Stud Installation Pitfall Avoidance Guide
As the “night vision” of road traffic safety infrastructure, solar road studs are widely deployed on highways, urban roads, and tunnel entrances/exits due to their advantages of requiring no external power source and offering easy installation. However, in actual construction, many crews overlook critical details, leading to immediate malfunctions, drastically reduced lifespan, and inadequate brightness. Common issues include water ingress causing short circuits during rain, solar panels being shaded and unable to charge, or loose fastenings resulting in damage from vehicle crushing. Drawing from 10 years of construction experience, we summarize key pitfalls to avoid during solar road stud installation below. This will help you complete projects efficiently and reduce long-term maintenance costs.
Avoid pits during the early stages of solar track stud construction
Avoiding site surveys and blind procurement
Many procure solar road studs based solely on drawings, completely ignoring actual conditions like sunlight exposure, traffic volume, and pavement material at the construction site. This often leads to subsequent problems. The correct approach requires a site survey before construction: First, conduct a sunlight assessment to avoid obstructions like trees, billboards, or bridges, ensuring the solar panel receives ≥4 hours of effective sunlight daily.
Next, inspect the road surface: choose the “expansion bolt mounting type” for asphalt roads and the “drill-and-grout type” for cement roads to prevent loosening due to surface incompatibility. Finally, research the environment: prioritize IP68 waterproof ratings for rainy regions and low-temperature (-40°C) models for frigid areas.
Neglecting product quality by focusing solely on price without considering specifications
Opting for low-cost solar panels with low conversion efficiency, falsely advertised battery capacity, and inferior casing materials will lead to frequent failures during use. Verify these three core specifications: Solar panels must be monocrystalline silicon with ≥22% conversion efficiency (superior to polycrystalline silicon) and impact-resistant tempered glass surfaces.
Prioritize lithium iron phosphate batteries with ≥2000 cycles, offering superior high/low temperature tolerance over standard lithium batteries. Housings must be aviation-grade aluminum alloy with ≥10-ton compression resistance and corrosion resistance. Additionally, select brands with third-party testing reports for enhanced quality assurance.
Insufficient tools and makeshift solutions hinder efficiency
Failure to prepare specialized tools in advance often leads to drilling inaccuracies and unstable installations during solar stud placement, severely impacting efficiency. Essential tool checklist: Road drilling machine: Must match stud installation hole dimensions. Use alloy drill bits for asphalt roads and diamond drill bits for concrete roads.
Level: Ensures studs are installed flat to prevent tilt and maintain optimal sunlight exposure. Sealant: Opt for neutral silicone sealant for waterproofing and anti-loosening properties. Also prepare cleaning tools—a brush and blower—to clear dust and debris from holes.
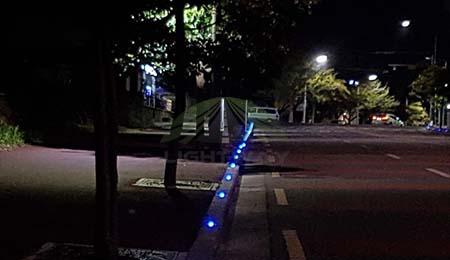
Avoid pits during solar track stud installation
Drilling deviations lead to looseness or installation failure
Mismatched hole diameter or depth with the stud causes either excessive wobbling (oversized hole) or failure to seat (undersized hole)—common installation errors. Strictly follow stud installation guidelines: diameter tolerance ≤ ±0.5mm, depth 2-3mm deeper than the stud’s embedded section (allowing dust clearance). After drilling, verify hole verticality with a spirit level. Deviation must not exceed 1° to ensure smooth subsequent installation.
Solar panel misalignment causes charging efficiency plunge
If solar panels aren't facing directly toward the sun after installation, or are obstructed by road markings or debris, charging efficiency will drastically decrease. Correct procedure: In the Northern Hemisphere, solar panels must face true south with an inclination matching local latitude (tolerance ≤5°) to ensure direct noon sunlight. Installation locations must avoid road markings like double yellow lines and crosswalks. If unavoidable, plan offset distances in advance to prevent markings from blocking panels.
Inadequate sealing leads to water ingress and short circuits during rain
Failure to seal the junction between track studs and pavement, or uneven application of sealant, coupled with opening traffic before full curing, easily causes water ingress and short circuits during rainy weather. Sealing must follow a 3-step process: First, thoroughly clean the hole to ensure no dust or moisture remains. After embedding the stud, evenly apply sealant along the base edge with a thickness ≥3mm, ensuring no gaps. Finally, allow 24 hours for complete curing before reopening traffic to prevent seal failure from vehicle crushing.
Improper fixing methods lead to loose and crushed markers
Asphalt roads use grouting, while concrete roads use expansion bolts—these mismatched methods cause markers to loosen and get crushed. Select fixing methods based on pavement material: Asphalt roads: Use dual fixation with “expansion bolts + sealant.” Apply sealant after tightening bolts. - Concrete roads: Pre-drill holes and inject specialized epoxy mortar. Insert studs, adjust level, and allow mortar to cure (approx. 12 hours) before traffic resumption for enhanced stability.
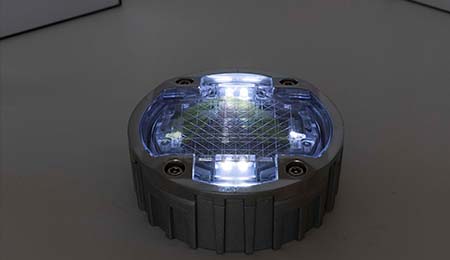
Failure to test after installation leaves hazards for the operational phase
Without post-installation power-on testing, some studs may malfunction due to poor contact or depleted batteries, leaving hazards unaddressed until use. Three mandatory tests after installation:
Power-on test: Press the stud's test button to verify uniform LED brightness and proper flashing. Charge test: Measure the solar panel's open-circuit voltage with a multi meter. Under ample sunlight, the voltage should be ≥6V (for 12V systems). Stability test: Gently shake each stud to ensure no loosening or abnormal noises.
Avoid pitfalls in the later maintenance of solar road studs
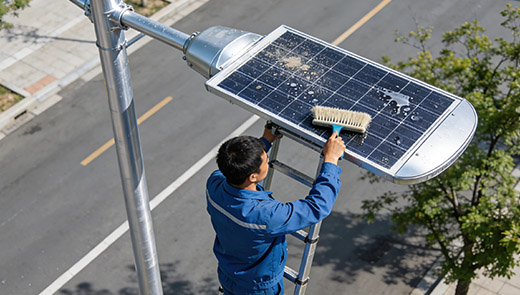
Many assume “installation equals completion,” but failing to regularly clear debris like dust, leaves, and bird droppings from solar panels degrades performance. Establish a maintenance schedule: Routine inspections: Weekly removal of surface debris. Wipe dust with a damp cloth (avoid scraping with hard objects). Quarterly inspections: Check for sealant cracks or loose studs. Address issues promptly by reapplying sealant or reinforcing. Annual testing: Measure battery capacity and LED brightness. Replace components if degradation exceeds 30%.
Blind troubleshooting leads to secondary damage during disassembly
Forcibly dismantling non-functioning studs risks damaging the casing or solar panel, causing further issues. Follow troubleshooting steps: First, check if the solar panel is obstructed. Clean it and retest. If still non-functional, use a multi meter to measure battery voltage. A voltage below 3.2V (for 3.7V batteries) indicates a depleted battery, requiring replacement. After ruling out battery issues, inspect the LED bulb for damage. When replacing, ensure the model matches to avoid voltage incompatibility.
Solar road stud installation appears straightforward but requires attention to multiple stages: preliminary site surveys, product selection, construction operations, and post-installation maintenance. Neglecting any detail may necessitate rework or cause stud failure. Mastering these key pitfalls not only boosts installation efficiency and reduces costs but also ensures solar road studs maximize their nighttime warning function, safeguarding road traffic safety.

