What Are The Best Practices For Installing Solar Street Lights?
Nov 13, 2025
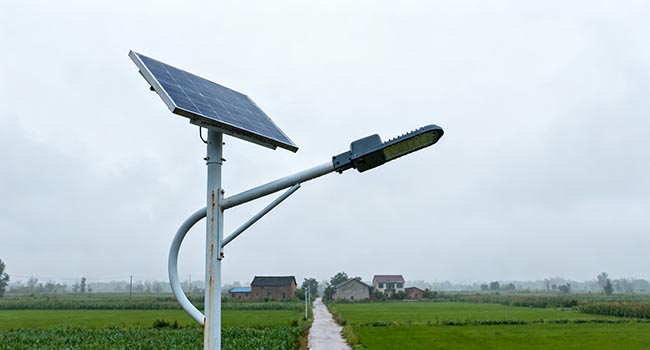
Solar street lights have gained widespread adoption in urban roads, rural paths, and park plazas due to their advantages of zero electricity costs, environmental friendliness with zero emissions, and flexible installation. However, 80% of their lighting performance, lifespan, and energy efficiency depend on the scientific approach to installation. This article breaks down core best practices for solar street light installation across dimensions including site assessment, equipment selection, layout and installation, smart upgrades, and operational compliance. It helps practitioners and project owners avoid common pitfalls to build stable and efficient solar lighting systems.
Preliminary Site Assessment
Pre-installation site evaluation is the first step to ensuring solar street lights perform effectively. A comprehensive assessment of sunlight exposure, environmental conditions, and lighting requirements is essential to guarantee precise alignment between the subsequent installation and site conditions.
Sunlight Exposure
Solar street lights rely on photovoltaic panels to absorb sunlight for power generation. Insufficient sunlight directly leads to battery depletion and reduced nighttime illumination duration. Use a solar radiometer to measure the site's average daily solar radiation, ensuring annual irradiation exceeds 4.2 kWh/m²·d (the basic standard for solar energy utilization). Avoid areas perpetually shaded by trees, tall buildings, or mountains. If unavoidable, precisely calculate shading duration and compensate for insufficient light by adjusting panel power ratings or installation orientation.
Addressing Climate Challenges
Regional climates and environments impose varying demands on equipment durability, necessitating tailored planning: In hot, arid regions, select high-temperature-resistant PV panels and LiFePO4 batteries to prevent accelerated component aging and battery overheating. In rainy coastal areas, lamp posts should use hot-dip galvanized + powder-coated materials, with connectors meeting IP67 waterproof standards to resist salt spray corrosion and moisture ingress.
In snowy, cold regions, increase the tilt angle of photovoltaic panels by 10° to facilitate snow sliding, paired with batteries that perform well in low-temperature discharge. In dusty, windy areas, increase the cleaning frequency of photovoltaic panels and select components with anti-soiling coatings to reduce dust obstruction.
Lighting Requirements
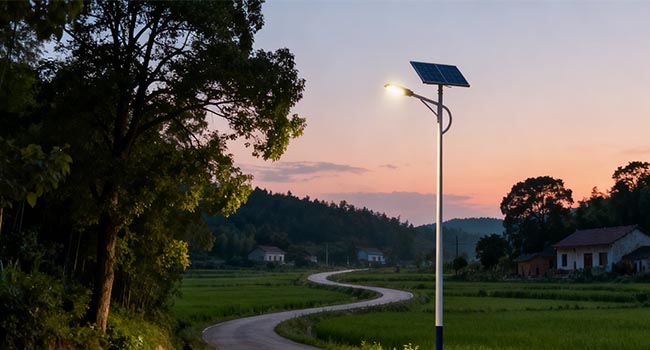
Different scenarios demand varying illumination levels. Precisely define requirements to avoid “overly bright waste” or “insufficiently dim ineffectiveness.” Rural paths (3-5 meters wide) require 10-15 lux brightness, urban secondary roads (6-10 meters wide) need 20-30 lux, and main thoroughfares (over 10 meters wide) demand 30-50 lux. Regarding lighting duration, standard scenarios require 8-10 hours of illumination. Remote areas should be equipped with backup power sufficient for 2-3 days of cloudy or rainy weather to ensure uninterrupted lighting during adverse conditions.
Equipment Selection
Core components of solar street lights include photovoltaic panels, batteries, LED luminaires, controllers, and light poles. Quality, performance, and site adaptability must be balanced to ensure stable system operation from the outset.
Photovoltaic Panels
Panel selection should balance sunlight conditions and budget. Monocrystalline silicon panels offer 18%-23% conversion efficiency, suitable for high-sunlight areas with superior power generation. Polycrystalline silicon panels offer 15%-18% conversion efficiency at a lower cost, suitable for areas with moderate sunlight. During installation, the panel tilt angle should match the local latitude (±5°). In the Northern Hemisphere, panels should face true south; in the Southern Hemisphere, true north. This maximizes sunlight absorption and power generation.
Batteries
Among mainstream options, LiFePO4 batteries offer the best overall performance. They provide a cycle life of 2000-3000 cycles, an energy density of 90-120Wh/kg, and high safety, making them suitable for high-temperature and high-safety-requirement scenarios. Lithium-ion (Li-ion) batteries offer a cycle life of 1000-2000 cycles and energy density of 100-150Wh/kg, making them suitable for standard solar streetlight applications. Lead-acid batteries have a limited cycle life of 500-800 cycles and energy density of 30-40Wh/kg, with average safety. They are only recommended for budget-constrained or short-term use scenarios.
LED Fixtures
LED luminaire power should be matched to lighting requirements: 15-30W for rural paths, 30-60W for secondary roads, and 60-100W for main thoroughfares. Key parameters to consider include: - Color Rendering Index (CRI) ≥70 to ensure true color reproduction - IP65+ protection rating for waterproofing and dust resistance - Service life ≥50,000 hours to reduce replacement frequency and lower operational costs.
Controller
The controller must feature charge/discharge protection, over-temperature protection, and light-controlled + time-controlled functions. It should support 10%-100% brightness dimming to effectively prevent overcharging and over-discharging of components, thereby enhancing energy utilization efficiency. Prioritize IoT controllers with remote monitoring and fault alarm capabilities to facilitate real-time equipment status tracking and streamline maintenance operations.
Light Pole and Base
Light poles shall be constructed from Q235 galvanized steel pipes with hot-dip galvanization + powder coating finish, ensuring ≥15 years corrosion resistance. Structural design must meet local wind speed requirements (typically ≥Wind Resistance Grade 12). Base concrete strength ≥C30, with dimensions customized based on pole height. ——6-meter poles require 600×600×800mm concrete bases; 10-meter poles require 800×800×1200mm bases. Embedded bolts must precisely match pole flanges. Allow 7-10 days for concrete curing to ensure strength compliance before pole installation.
Layout and Installation
Optimal luminaire placement and standardized installation procedures are critical for eliminating dark zones and ensuring system stability. Strict adherence to scientific standards is required.
Luminaire Layout
Installation heights should match the application scenario:
Sidewalks: 5-6 meters
Rural roads: 6-8 meters
Urban secondary roads: 8-10 meters
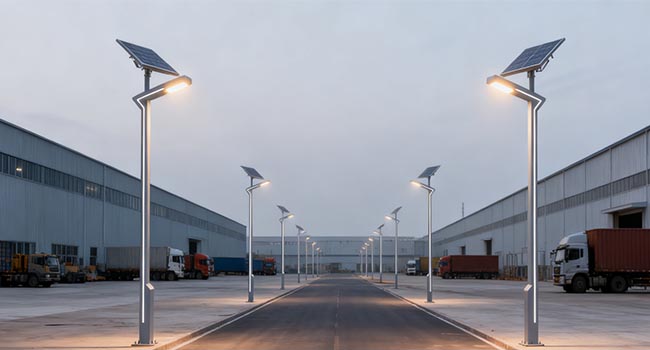
Main thoroughfares: 10-12 meters Maintain spacing at 1.2–1.5 times the pole height (e.g., 9.6–12 meters for 8-meter poles) to ensure light overlap eliminates dark zones. Precisely control photovoltaic panel orientation: strictly south-facing in the Northern Hemisphere (±5° tolerance) and north-facing in the Southern Hemisphere to prevent 10–20% power generation loss from misalignment.
Foundation Construction
Foundation construction must ensure structural integrity. Prior to construction, verify geological conditions to avoid installation in soft soil areas; perform soil reinforcement where necessary. Precise measurement is required for embedded anchor bolt positions to ensure perfect alignment with the light pole flange holes, preventing pole tilting after installation. During concrete pouring, ensure thorough compaction to prevent defects like honeycombing or pitting. Maintain proper curing for 7-10 days post-pouring, and only proceed with pole hoisting once strength requirements are met.
Wiring Connections
Use RVV 2.5mm² copper-core cables for superior weather resistance and conductivity. Avoid aluminum wires (prone to oxidation and breakage, shortening service life). All joints must use IP67-rated waterproof terminals. After connection, wrap with waterproof tape for dual protection against rain ingress. During cable routing, avoid sharp objects to prevent cable abrasion. Internal wiring within the pole must be neatly organized and securely fastened to prevent joint disconnection due to vibration.
Post-Installation Testing
After installation, conduct comprehensive testing to ensure system functionality:
Component Inspection: Verify solar panels are undamaged with secure wiring, LED fixtures show no cracks, light covers are clean, and poles exhibit no deformation.
Charging Test: Measure open-circuit voltage of solar panels with a multi meter to confirm compliance with rated values (e.g., 18V panels should read approx. 22V). Third, conduct a lighting test: cover the solar panel with a cloth to simulate nighttime conditions. Observe whether the luminaire illuminates normally, and verify that dimming and time-control functions operate correctly. Address any issues promptly.
Operation and Maintenance
Although solar street lights are “off-grid,” regular maintenance can extend their lifespan from 5-8 years to 10-15 years. This prevents minor faults from causing system failure and ensures long-term stable operation.
Solar Panel Cleaning
Adjust cleaning frequency based on environmental conditions: clean every 3-6 months in general areas, monthly in dusty or snowy regions. Use a soft cloth and water for cleaning; avoid scraping with hard objects. Never clean during midday heat (temperature shifts can cause glass shattering).
Component Inspection
Conduct regular inspections focusing on critical components. Examine batteries every six months to check for corrosion at connection terminals or swelling of the battery casing. Replace any affected batteries promptly. Inspect LED fixtures annually, cleaning dust from the light covers and checking for blackened LED chips (indicating aging). Replace fixtures as necessary. Inspect controllers every six months to ensure the display functions correctly, parameter settings are accurate, and button operations are responsive.
Software Upgrades
For smart street lights with remote monitoring capabilities, controller firmware must be upgraded regularly—at least once annually. This process optimizes energy-saving algorithms, patches system vulnerabilities, enhances operational stability and intelligence, and ensures smart functions perform reliably.
Installing solar street lights is not merely “erecting poles.” It is a comprehensive scientific process encompassing site assessment, equipment selection, layout installation, and compliant operation and maintenance. Adhering to the best practices outlined in this document ensures reliable and long-lasting illumination while maximizing energy savings and minimizing operational costs. This approach truly delivers a “one-time installation, ten-year benefit,” contributing to green lighting initiatives.
related
-
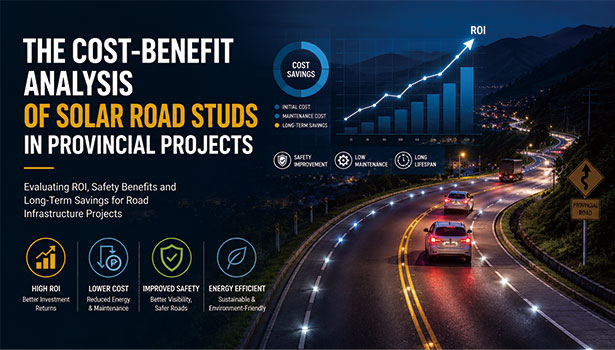 Off-Grid Road Safety: The Cost-Benefit Analysis of Solar Road Studs in Provincial ProjectsJun. 24, 2026
 -
 The Ultimate Checklist for Inspecting Road Studs Before Installation in Infrastructure ProjectsJun. 04, 2026
 -
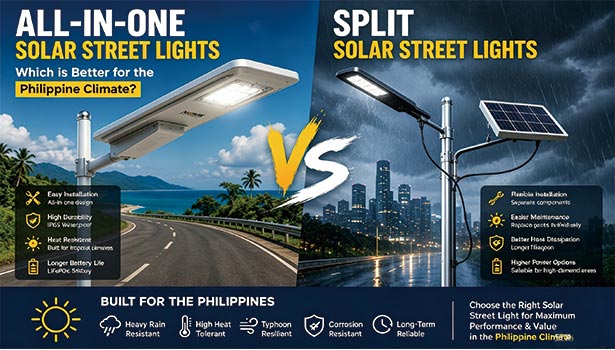 All-in-One vs. Split Solar Street Lights: Which is Better for the Philippine Climate?May. 26, 2026